
I finished my first quilt.
!!!
Before sharing the finished product, you’ll have to sit through photos of the process.
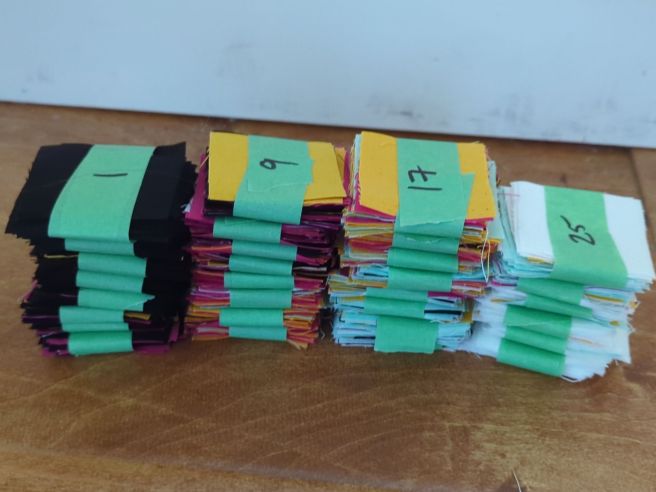
Step one: Cut many 2″ squares. How many? More than what’s pictured, actually.

Two: Arrange squares in a pattern. I settled for organized chaos.

Three: Stack the squares neatly row by row for ease of transportation.
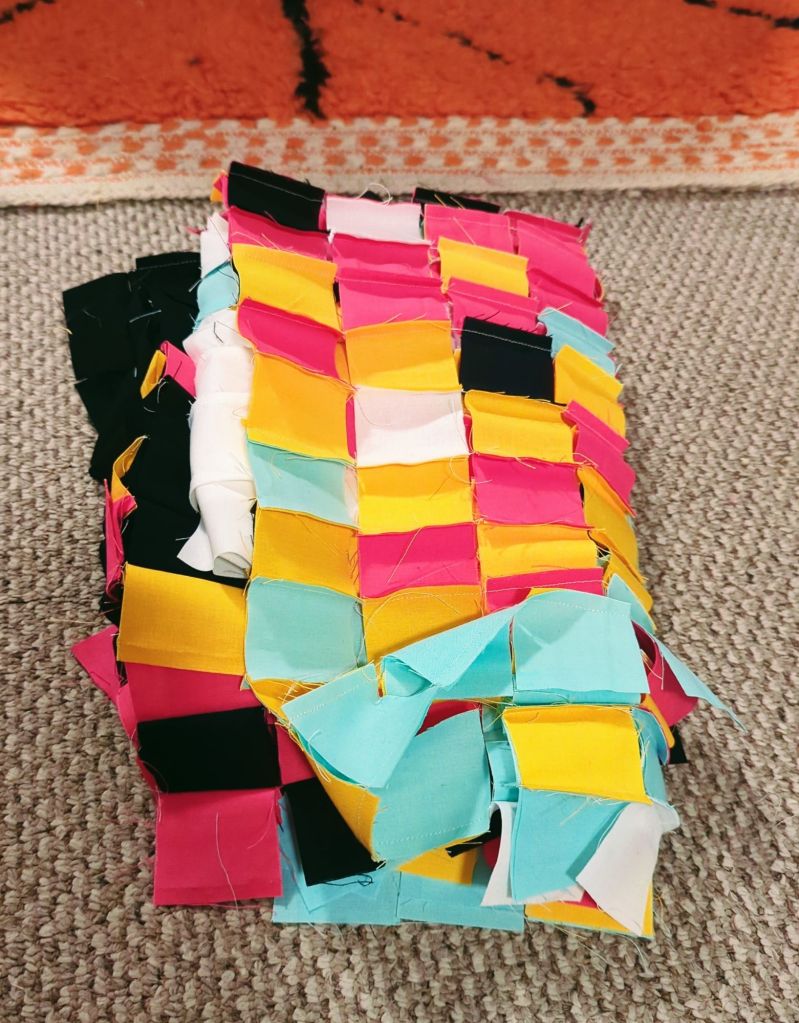
Four: Stitch the rows in pairs, then the pairs into quads, and the quads into octets.
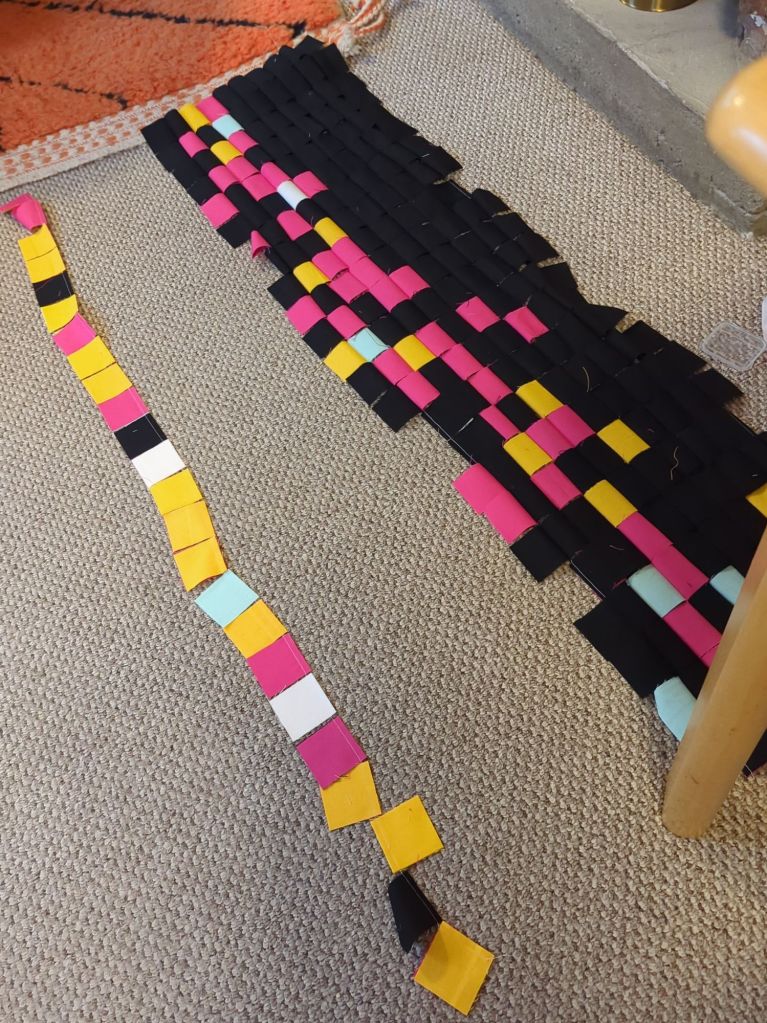
I realized after the first four rows that I’d reversed the order. No biggie: I’d simply mirror the image. Except the photo editing app on Google Pixel doesn’t appear to have that feature, so the interpreter did it on her iphone and sent it back to me. Now I know to work from right to left as I’m right-handed.
This was my first of many, many mistakes.
Five: Press open seams. Ugh, the worst. Sewing puts me in a trance, but I’m unimpressed by pressing.

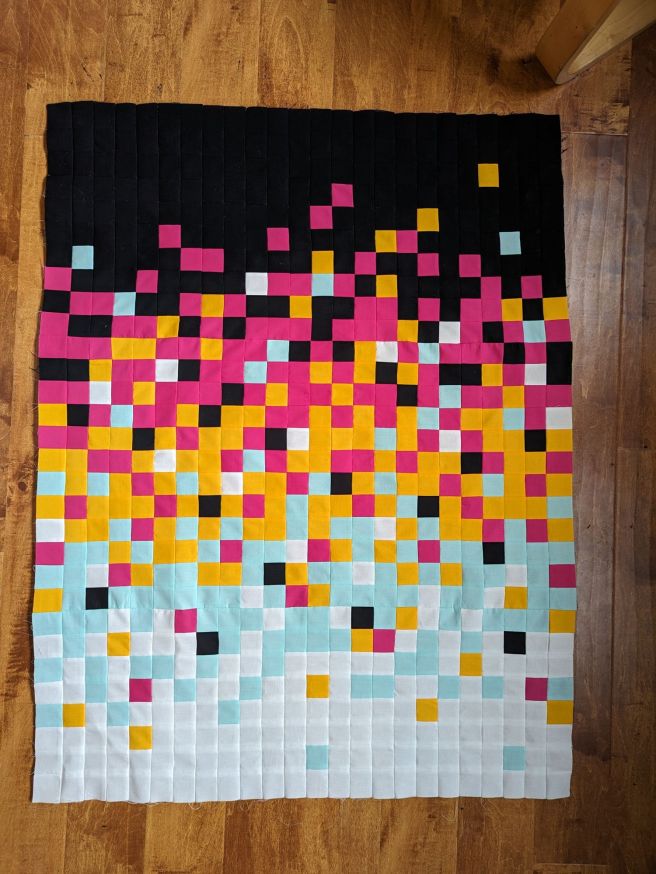
Six: Sew together columns.
Seven: Iron backing, batting, and the finished quilt top. Pin together layers. Using lots of pins. So many pins that I had to buy another box.

Eight: I left my sewing machine at the workshop after pinning my layers together so that Bill Murray could un-fuck it. Apparently, it was stuck in buttonhole mode. I wasn’t convinced Bill did a complete un-fucking of my machine when I noticed the stitch lengths were inconsistent upon piecing (sewing layers together) the quilt.
I emailed the workshop asking for advice, which came in the form of a question: “Are you using a walking foot?”
No… I was not.
So, I mounted my bike and rode to Sawyer’s Sewing Centre for a $64 walking foot attachment. I did not take pictures of my bike ride/shopping experience, so onto the next step…
Nine: Diagonal lines. Classic. Made slightly more exciting with two different coloured threads: magenta and yellow-orange. Wooh!

The walking foot attachment made all the difference. I figured I could get away without using one, as my batting (middle layer) was fairly thin. I also didn’t understand how a walking foot functioned. What it does is act as a feed dog for the top layer. Totally worth the $64 and a sweaty bike ride.
Ten: Trim the batting to match the top layer and leave a 1″ border of backing.
Nobody showed me how to do a mitered corner, nor did I look for a how-to video/guide. I was sure I could figure it out. And I did, but not until the 4th corner did I get it right in the first pass.
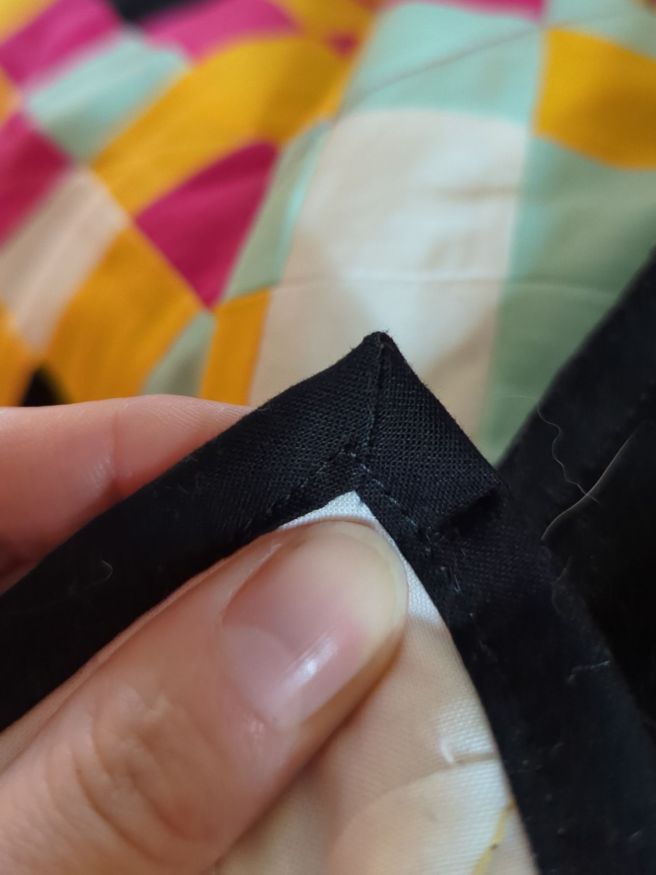
Finally, I fold over the backing and top-stitched it as a border.
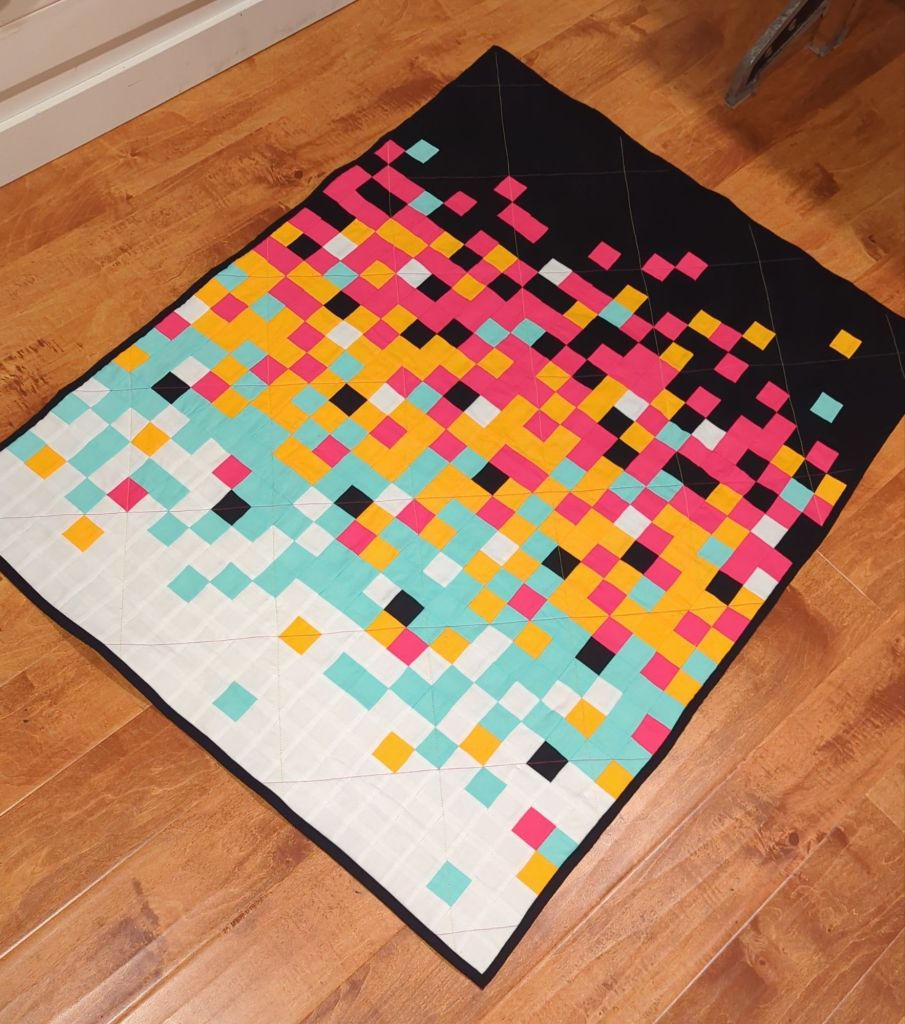
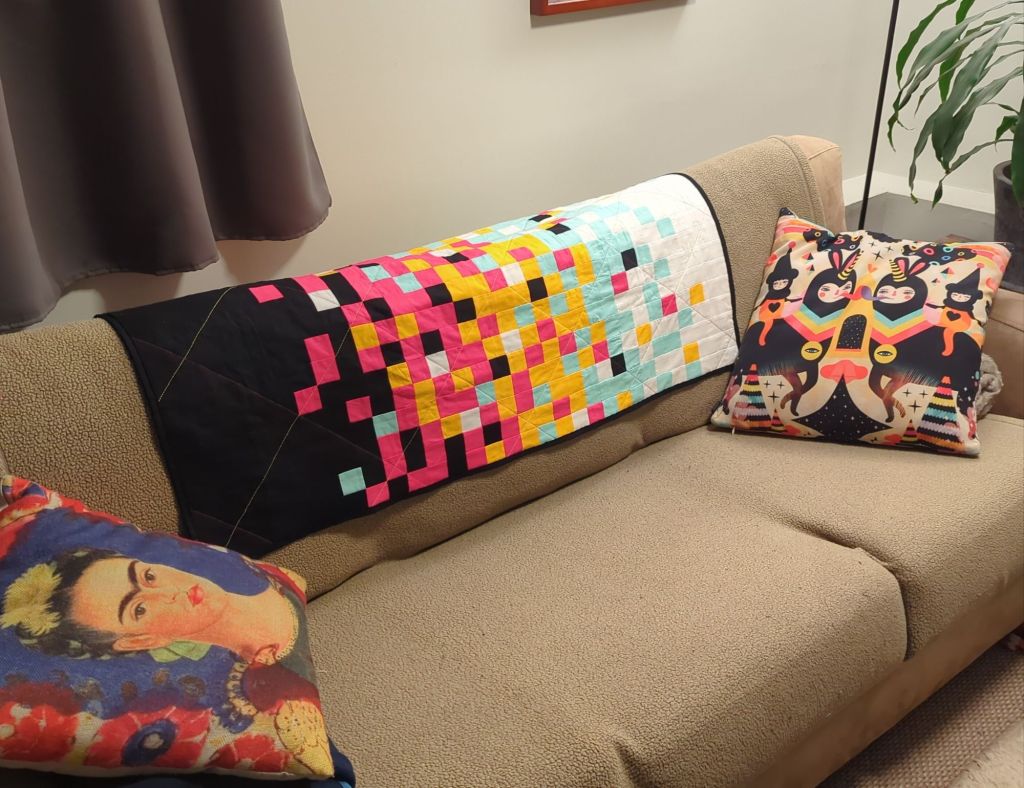
And this leaves me with a 35″ x 45″ quilt. I’m pleased with how it turned out and a little disappointed that I’m slightly larger than a baby.
Since the quilt is made of uniform-sized squares, it was not a complicated project. It was just a lot of work.
A LOT OF WORK.
And I don’t expect my future quilting projects to be any less time-consuming. What I like about quilting is how it’s visual from start to finish, unlike knitting, where you’re unsure how your project is coming along until you’re about 75% done.
Maybe I just wasn’t good at knitting?

The quilt turned out beautiful! The black border really brings it together. Congratulations!
LikeLiked by 1 person
Thank you! I still don’t know if I’m going to keep it! 😬
LikeLiked by 1 person